Live chat support gives customers a faster and more convenient way to get in touch with you or your customer service team. Think of it this way, you are there ready to help when your customer needs you the most. You get their most burning questions answered immediately. You got to strike while the iron is hot.
Which Live Chat Software Should I Use?
There are tons of live chat software in the market, both free and paid software. Some are very simple to use while there are some tools that provide more extra bells and whistles (in addition to live chat). Depending on your requirements, If your objective is to provide a convenient way for customers to reach out to you, there are free options which in my opinion is more than enough.
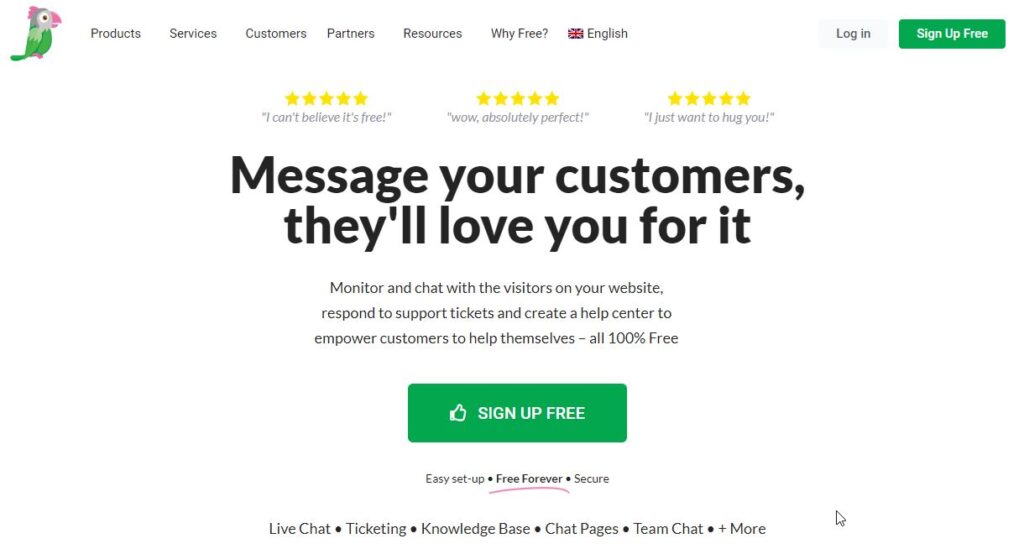
Tawk.to live chat software is probably one of the good free software. It is easy to set up, solid, and yes 100% free. You don’t have to pay a single penny to take advantage and add live chat to your website. Well, Tawk.to does show “Powered by tawk.to” branding on the chat widget. (Unless the tawk.to branding bother you so much, you can get it removed for $19/month.)
Tawk.to not just a live chat tool, they also have a few other tools built-in, including ticketing, knowledge base, and a few more. So as you can see, this software is quite a powerful tool. The live chat works on pretty much any platform such as Systeme IO, WordPress, and more. In this example, I will use Tawk.to live chat tool to walk you through the setup process in Systeme IO.
Steps To Setup Live Chat on Your Website
There are a few simple steps to have a live chat set up on your website. It is very straightforward and you will be up and running in no time. There is no coding or any complicated configurations required.
- Sign up for a Tawk.to account
- Perform Basic setup
- Install the live chat widget
(1) Sign up a Tawk.to Account
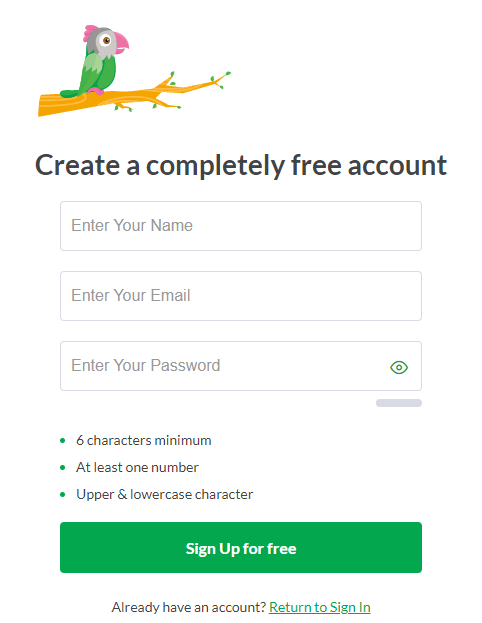
Go to tawk.to and sign up for a free account by clicking on the Sign Up Free button located on the top-right.

The signup process is simple and self-explanatory. Just enter your name, email, and your chosen password to create an account.
(2) Perform Basic Setup
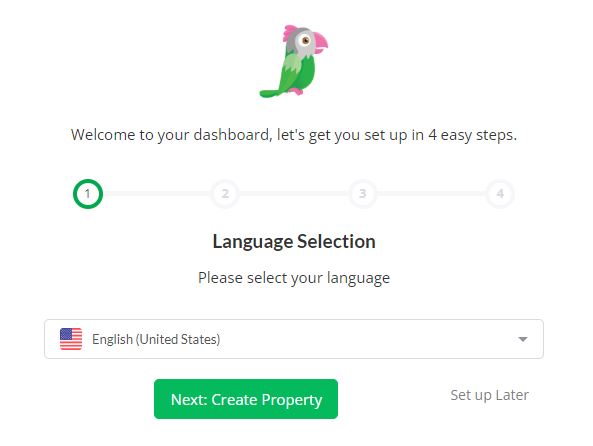
Tawk.to will walk you through the setup process. Follow and complete the simple steps. First, select your preferred language.
Next, provide the property details which are your website name and URL (see example below)

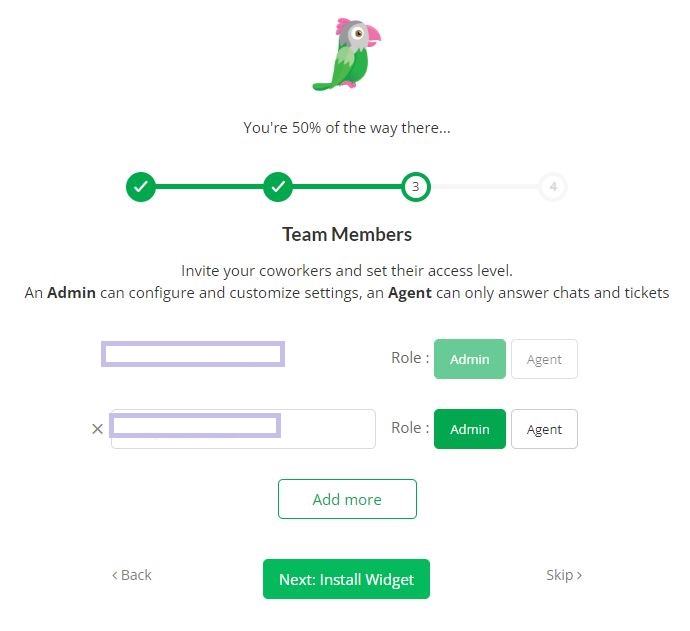
Next, if you have an assistant or customer support team, enter their email address and specify their role.
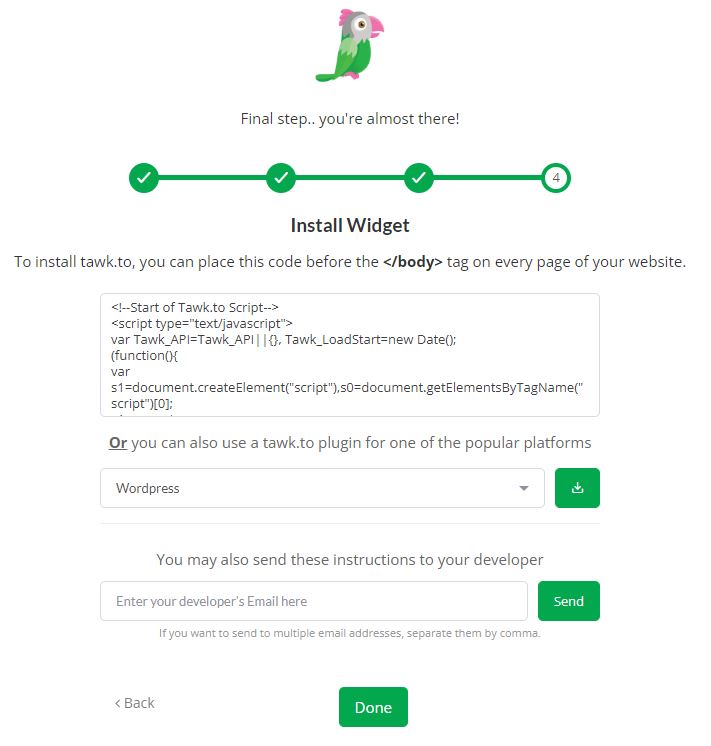
Last but not least, next will need to install the live chat widget so that it shows on the website. To set up in your Systeme io website, select and copy the code given (don’t worry, you don’t have to understand a single of the code)
For the sake of simplicity, you may want to leave this window open while you working on the widget installation. (you can also get the widget code later from your Tawk.to account. Go to Settings – Chat Widget.)
Now, open a new tab on your browser and log in to your Systeme io account.
(3) Install The Live Chat Widget
In the Systeme io dashboard, open the page where you want to insert the live chat widget to. In this example, let’s say I want to insert the live chat widget to the squeeze page, and I would open the page editor.

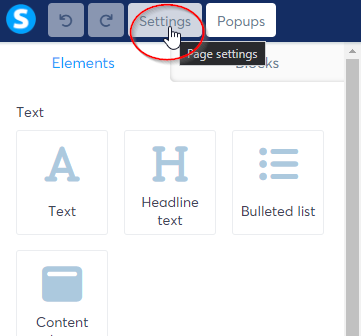
Click on the Settings at the top of the page and then scroll all the way down to the bottom.
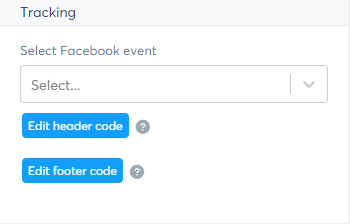
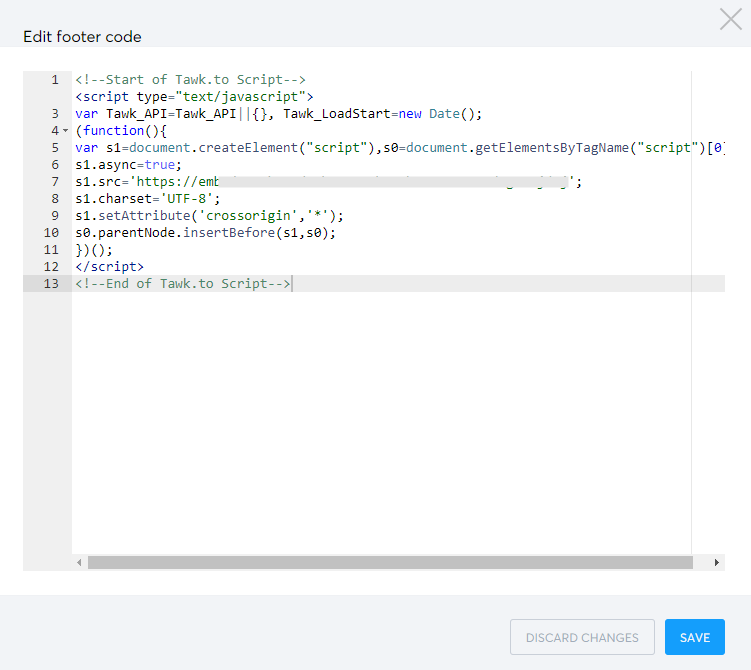
Under the Tracking section, you will see “Edit footer code”. Click on it and then paste the code you copied from Tawk.to earlier. Remember to hit Save.
Meanwhile, you may click the Done button on the Tawk.to’s window which you left open earlier.
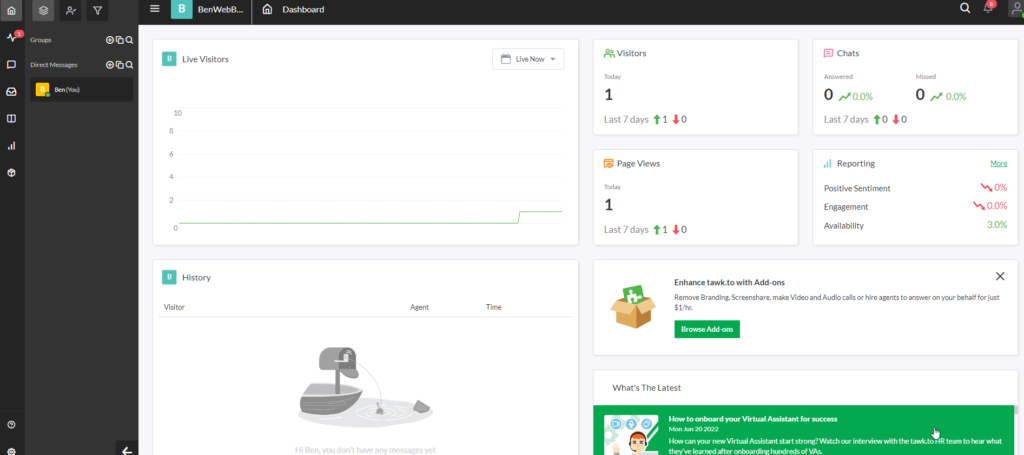
You will be brought to the dashboard. Here you will be able to see an overview and history of your visitors, chats, and page views over the last 7 days.
That’s all. The setup is done.
How To Test If The Live Chat is Working?
Open the website (or page where you have installed the live chat widget earlier), and voila the live chat widget is live waiting for the first prospect 🙂 Click on the button and your prospects would be able to start a conversation.

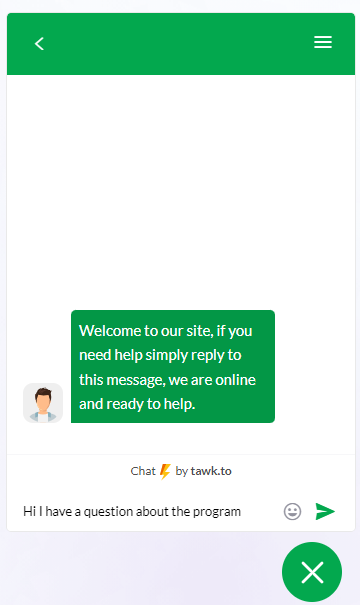
Open up the widget and type a test text message, and hit send.
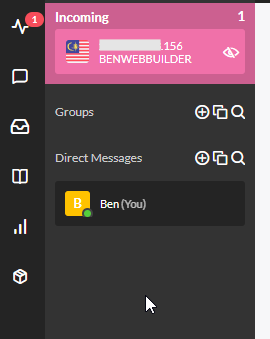
Your Tawk.to admin dashboard will be buzzing with an alarm sound, to alert you that there is an incoming message. Click on the incoming message and you will be able to join the conversation by clicking the “Join” button

And yes, you (and/or your customer support agents) need to keep the window (tab) open to receive the notification.
Tawk.To Tips: How Not To Lose A Single Prospect
Chances are, you may not be online 24/7 and the fact is, your visitors may be living on the other side of the world. How to minimize the chances that you will not lose any prospect who tries to contact you while you’re offline?
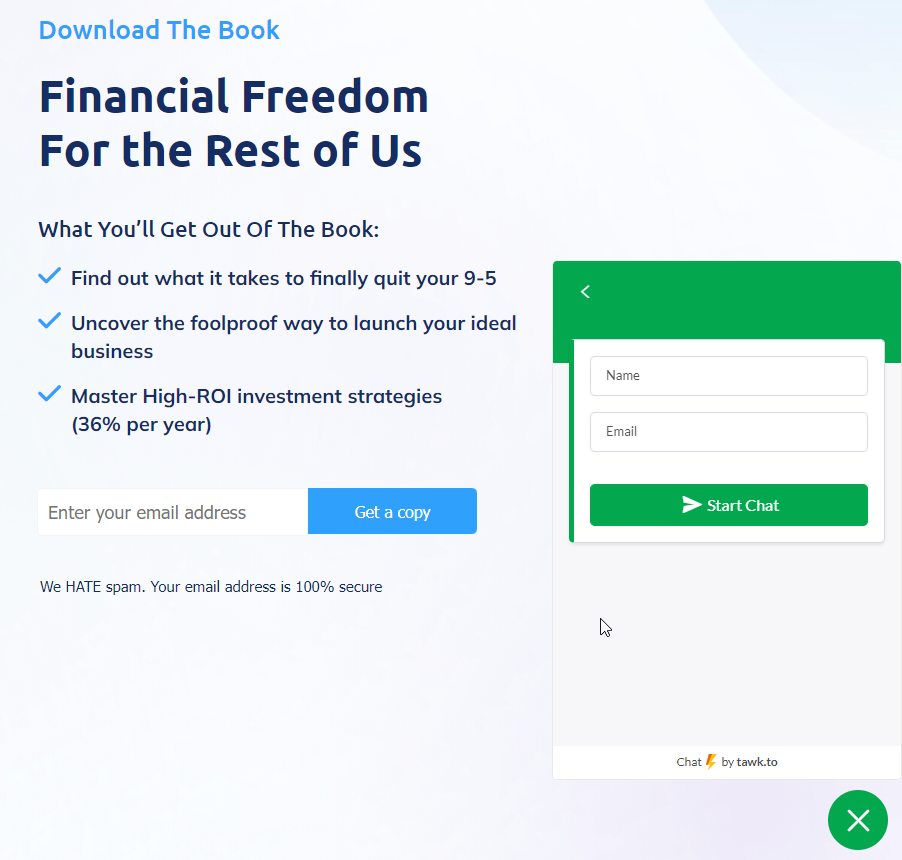
The simple solution is to ask for their name and email before starting the chat.
let’s check out how to enable this feature within Tawk.to.
Ask For User Details in Pre-Chat Session
The pre-chat form allows you to get your users’ details such as names, email, phone, or any other info that you may want to collect.
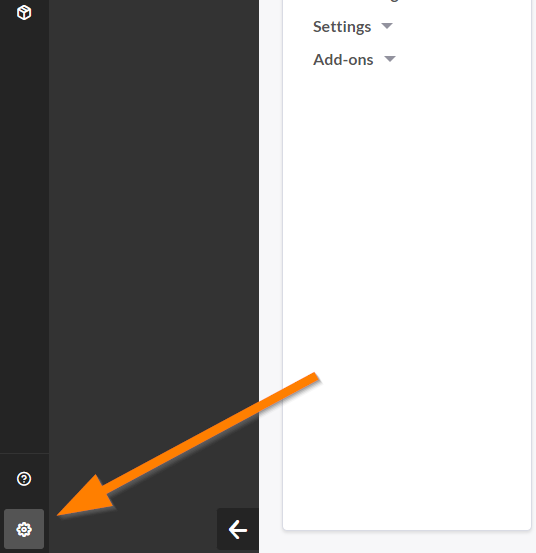
First, click on the Settings (i.e. gear icon) at the bottom-left of your Tawk.to dashboard. This is the administration area where it allows the owner to do further configurations, which are optional.
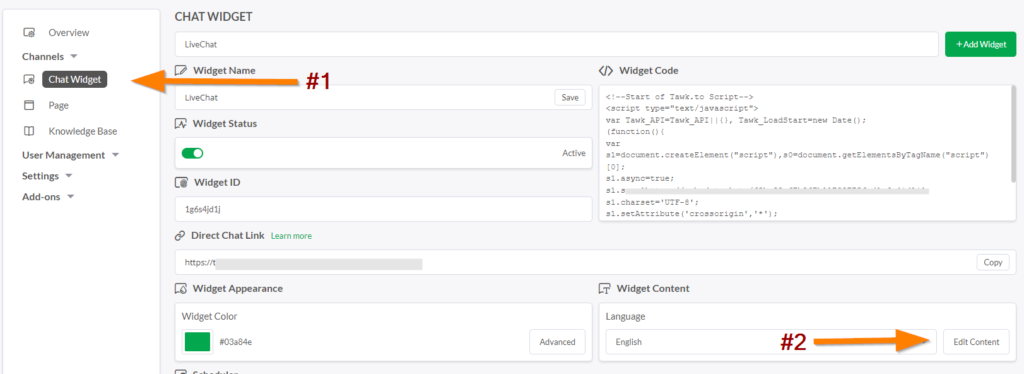
Click on the Chat Widget (#1) under the Channel. Then click on Edit Content (#2)
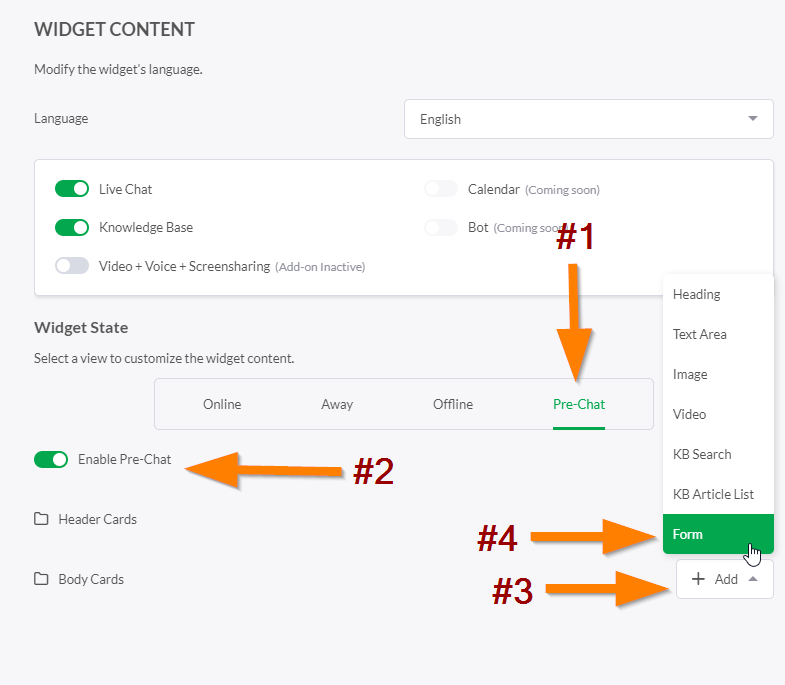
Click on the Pre-Chat tab (#1) and enable the Pre-Chat (#2). Under Body Cards, click on the “+ Add button” (#3) and select Form (#4)
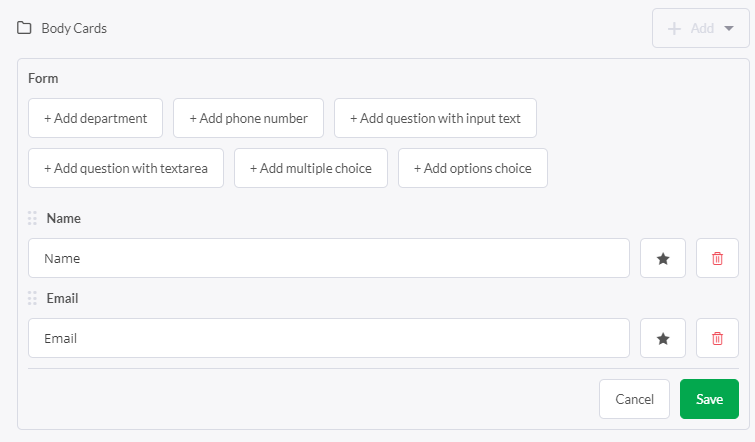
By default, the name and email are automatically selected for you. If you would like to add more fields (eg depart, phone number, etc), you can select from the option listed on the screen. Click Save and you’re done.
Tawk.to Mobile App
Another great alternative not to miss your prospects’ message is to install the Tawk.to’s mobile app.
Tawk.to app in Apple’s Appstore – https://apps.apple.com/us/app/tawk-to/id907458277
Tawk.to app in Google’s Playstore – https://play.google.com/store/apps/details?id=to.tawk.android
Conclusion
Live chat software is a very useful and convenient way for your prospects to reach out to you. Not all customers like to contact you via email, ticket submission, phone support, or social media. Having a live chat on your website may help to increase your conversion and hence your bottom line.