Background noise is something that is unavoidable. In certain cases, the noise is very soft and not too noticeable. But sometimes, the noise can be irritating, especially to the listener. Generally, the background noise can be any unwanted noise that gets recorded in your audio or video. It can be fan nose, raining sound, etc.
Removing background noise is important especially when you’re doing commercial voiceover or recording video for training, webinar, and any kind of voice recording for your audience. You don’t want to disrupt the audience with unidentified background noise when their focus should be on the topic or subject that you are talking about.
Some video editing software has built-in background noise removal, which comes in handy. While some provide pretty basic settings and the results may not be great.
In any way, thanks to Audacity, you can utilize this great tool to remove your audio background noise pretty easily.
If you have not already downloaded the software, go to the audacity website and install it on your computer. It supports Windows, macOS, and Linux.
Installing PPmpeg Library

If you need to import a much larger range of audio formats such as M4A, AC3, MMR, WMA. You will need to install the FFmpeg library. This is OPTIONAL and you can skip this part if you just want to clean up the noise of simple audio in a simple audio format such as .mp3, .wav, etc.
Go to 64-bit FFmpeg Library Download (buanzo.org) and download the installer and install it. You can choose either the .exe or .zip package.

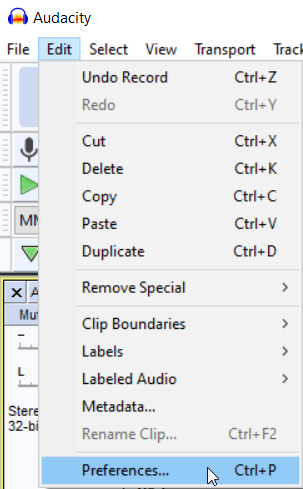
Once you’ve successfully installed the FFmpeg library, go back to the Audacity, open the Preferences window at Edit – Preferences
Click on Libraries. If you click on the Locate button, Audacity will link up with the FFmpeg library.

Background Noise Removal
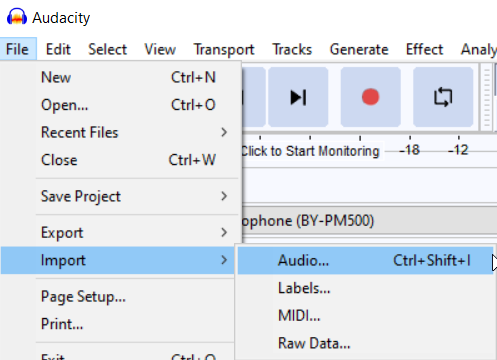
To start removing the background noise of your audio file, first, bring in your audio file to Audacity. You can do so from File – Import – Audio
If your source is a video file, you will first need to export the audio portion of your video before you can import it to Audacity.
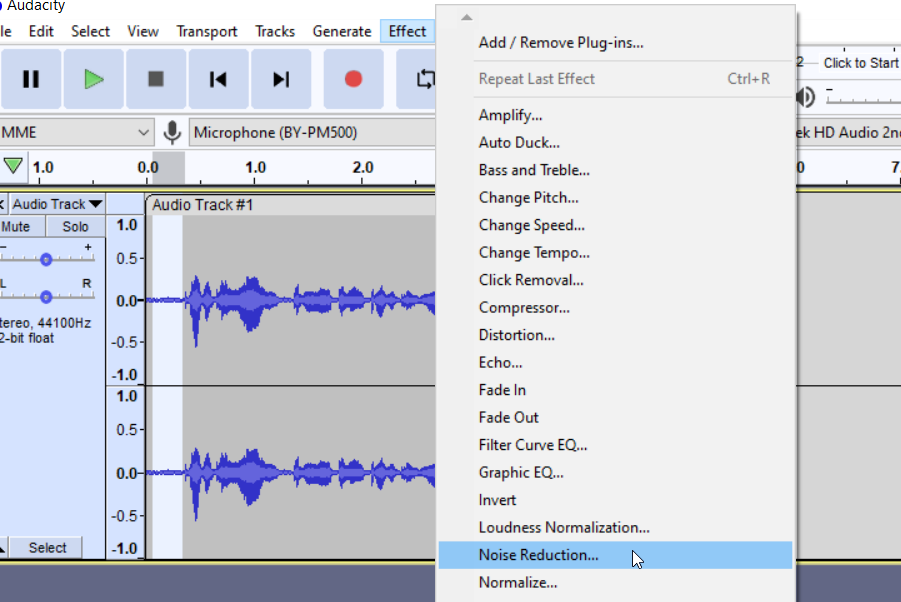
To get started, highlight the sample of the noise area that you want to remove. (tips: usually the area with near-flat waveform)

Then from the menu, go to Effects – Noise Reduction
Click on the Get Noise Profile button and you will be brought to your audio waveform area. on the waveform area, click Ctrl + A to select the entire audio. Now go back to the Noise Reduction window (Effects – Noise Reduction)
There are a few things that you can adjust i.e
- Noise Reduction
- Sensitivity
- Frequency Smoothing
First, try to set Noise Reduction to 0 and Preview the noise reduction quality by pressing the Preview button below. Next, you can increase the Noise Reduction to a higher range to see which one works best for you. In my case, it works best with the following settings.
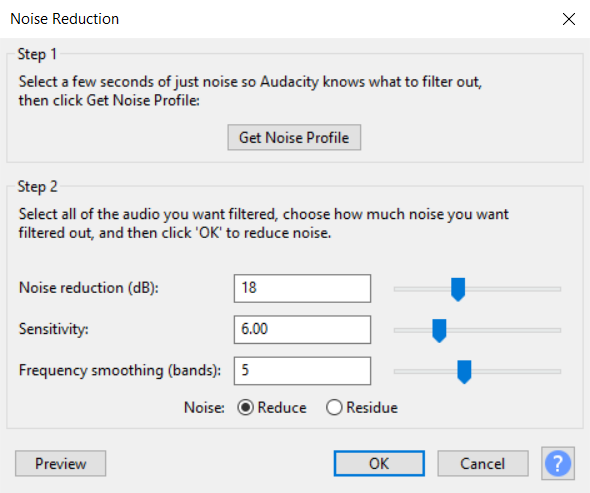
You can adjust the sensitivity and frequency smoothing if needed.
Once you are done, export the audio that you have fixed (with background noise removed or reduced) and it is ready to use. You may either import it back to your video editor software or if it is a podcast, you can upload it to your podcast site.